前期准备
环境与依赖
我的服务器上已经安装有了web服务:
- Debian 11.4
- Nginx 1.20.2
- PHP 8.0.20
- MySQL 5.7.34
建站环境的搭建我使用了 lnmp.org 中的建站脚本。
按照官方文档,需要进行以下操作以安装必要依赖:
更新
apt update依赖安装 (在官方文档中,最后的一个依赖项为libmysqlclient-dev ,无法安装,经查找后发现应修改为 default-libmysqlclient-dev)
apt install python3 python3-setuptools python3-pip python3-ldap default-libmysqlclient-dev -yTip

- 如安装时出现图上错误,则需要更换更新源,可参考此篇 Debian10/11 官方更新源 ,更换完成后重新 apt update,再运行上述安装命令
pip3 install --timeout=3600 django==3.2.* future mysqlclient pymysql Pillow pylibmcpip3 install --timeout=3600 captcha jinja2 sqlalchemy==1.4.3 psd-tools django-pylibmc django-simple-captcha pycryptodome==3.12.0 lxml创建目录并下载安装包
依官方文档推荐,应做如下操作:
首先需下载安装包至服务器
下载地址:seafile.com
下载完成后,创建seafile目录,并将安装包移动至目录下
mkdir /opt/seafile
mv seafile-server_* /opt/seafile
解压,之后创建安装目录,并将解压后的文件移动到安装目录下
tar -xzf seafile-server_*
mkdir installed
mv seafile-server-* installed
创建同用户名的三个数据库
Seafile 的安装过程中会需要三个数据库,分别用于 seafile、seahub、ccnet,我在phpMyAdmin中创建了三个数据库,并通过权限赋予,为它们添加了同一个登录用户名。
(如果想通过命令行来创建用户及数据库可另行搜索。)
具体步骤如下:
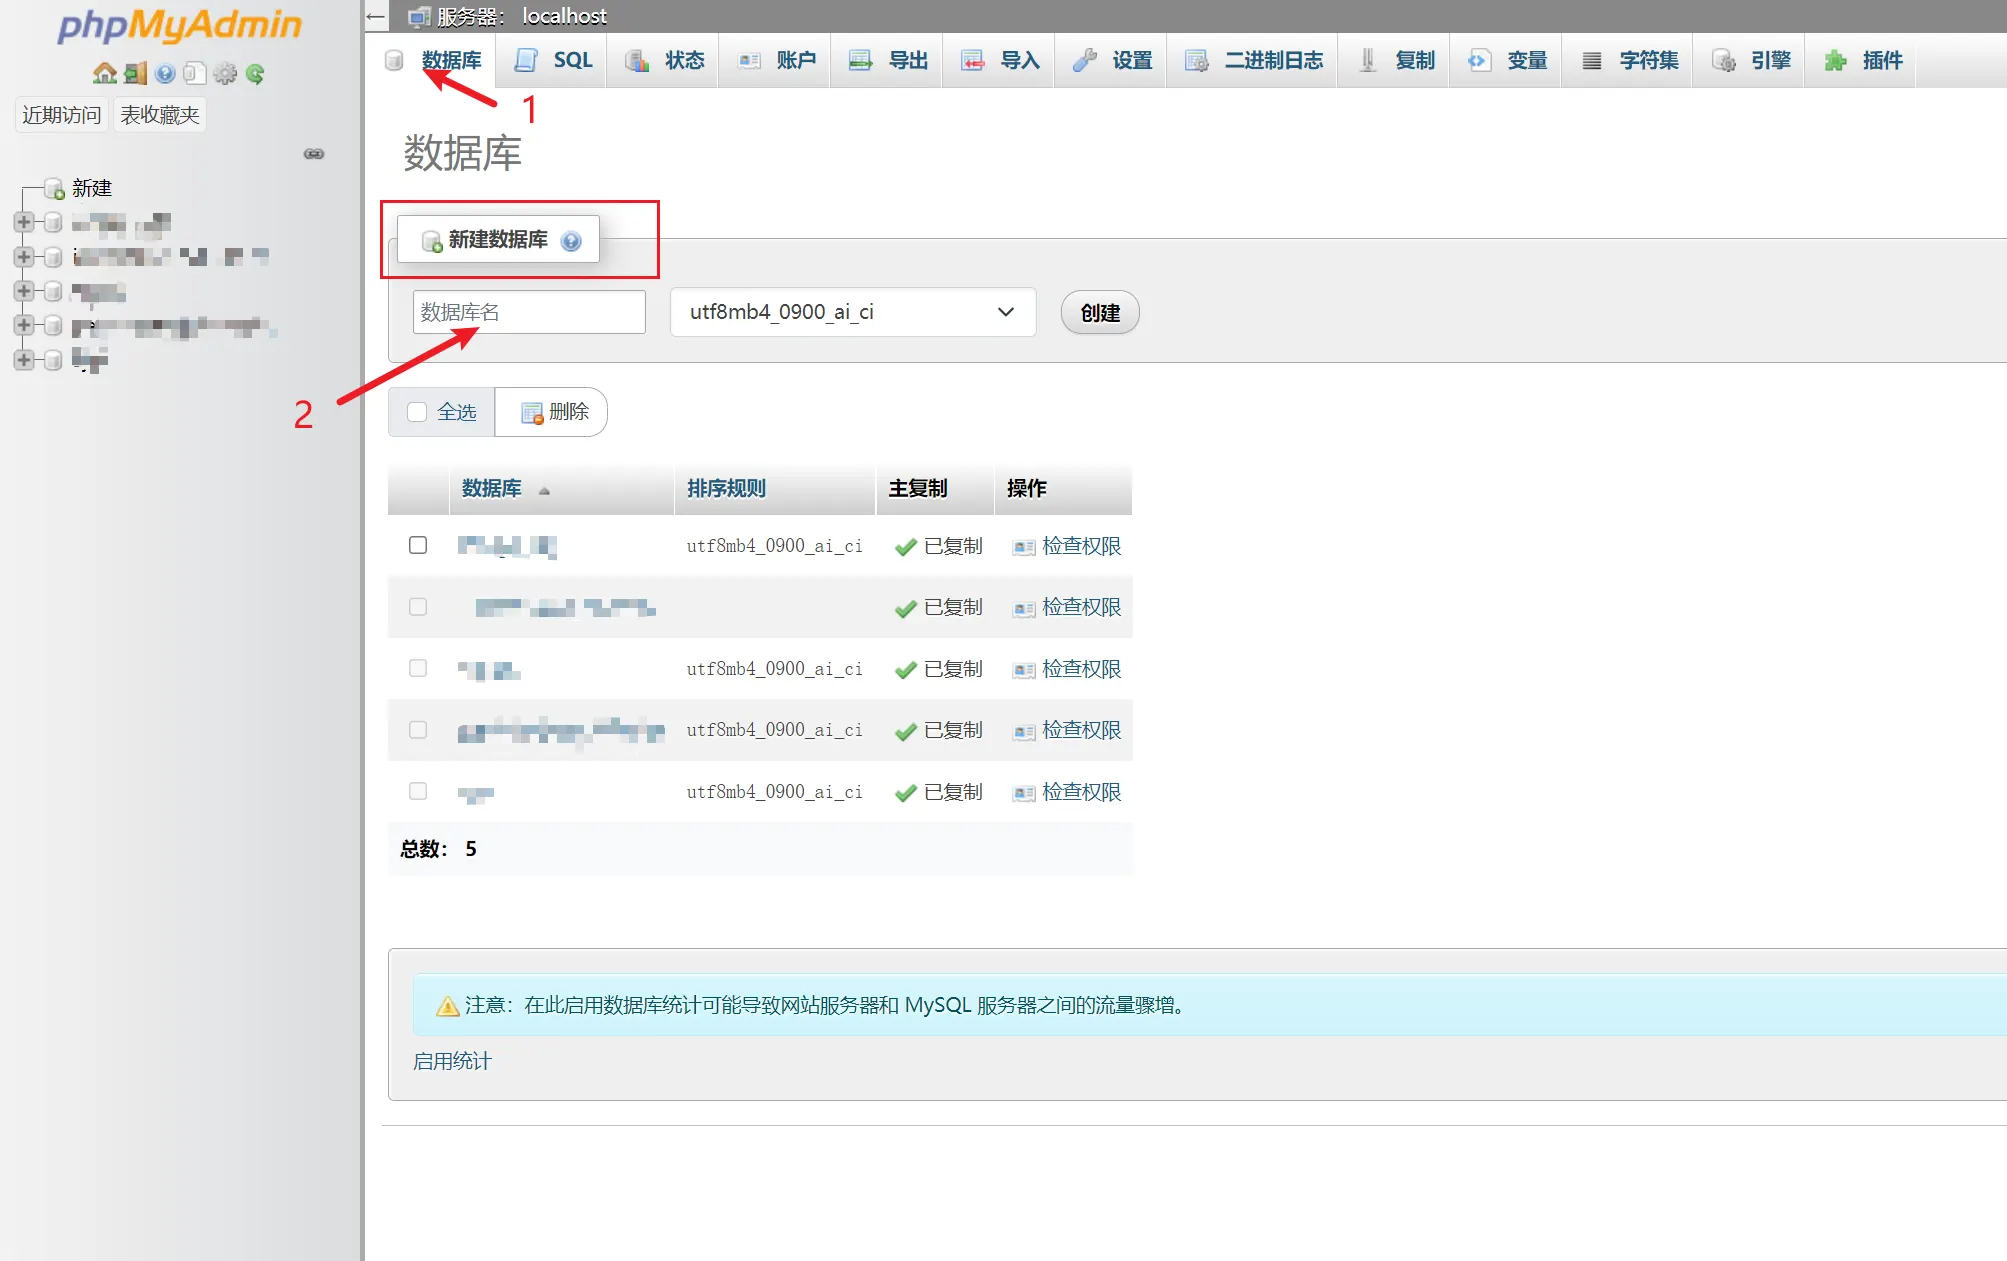
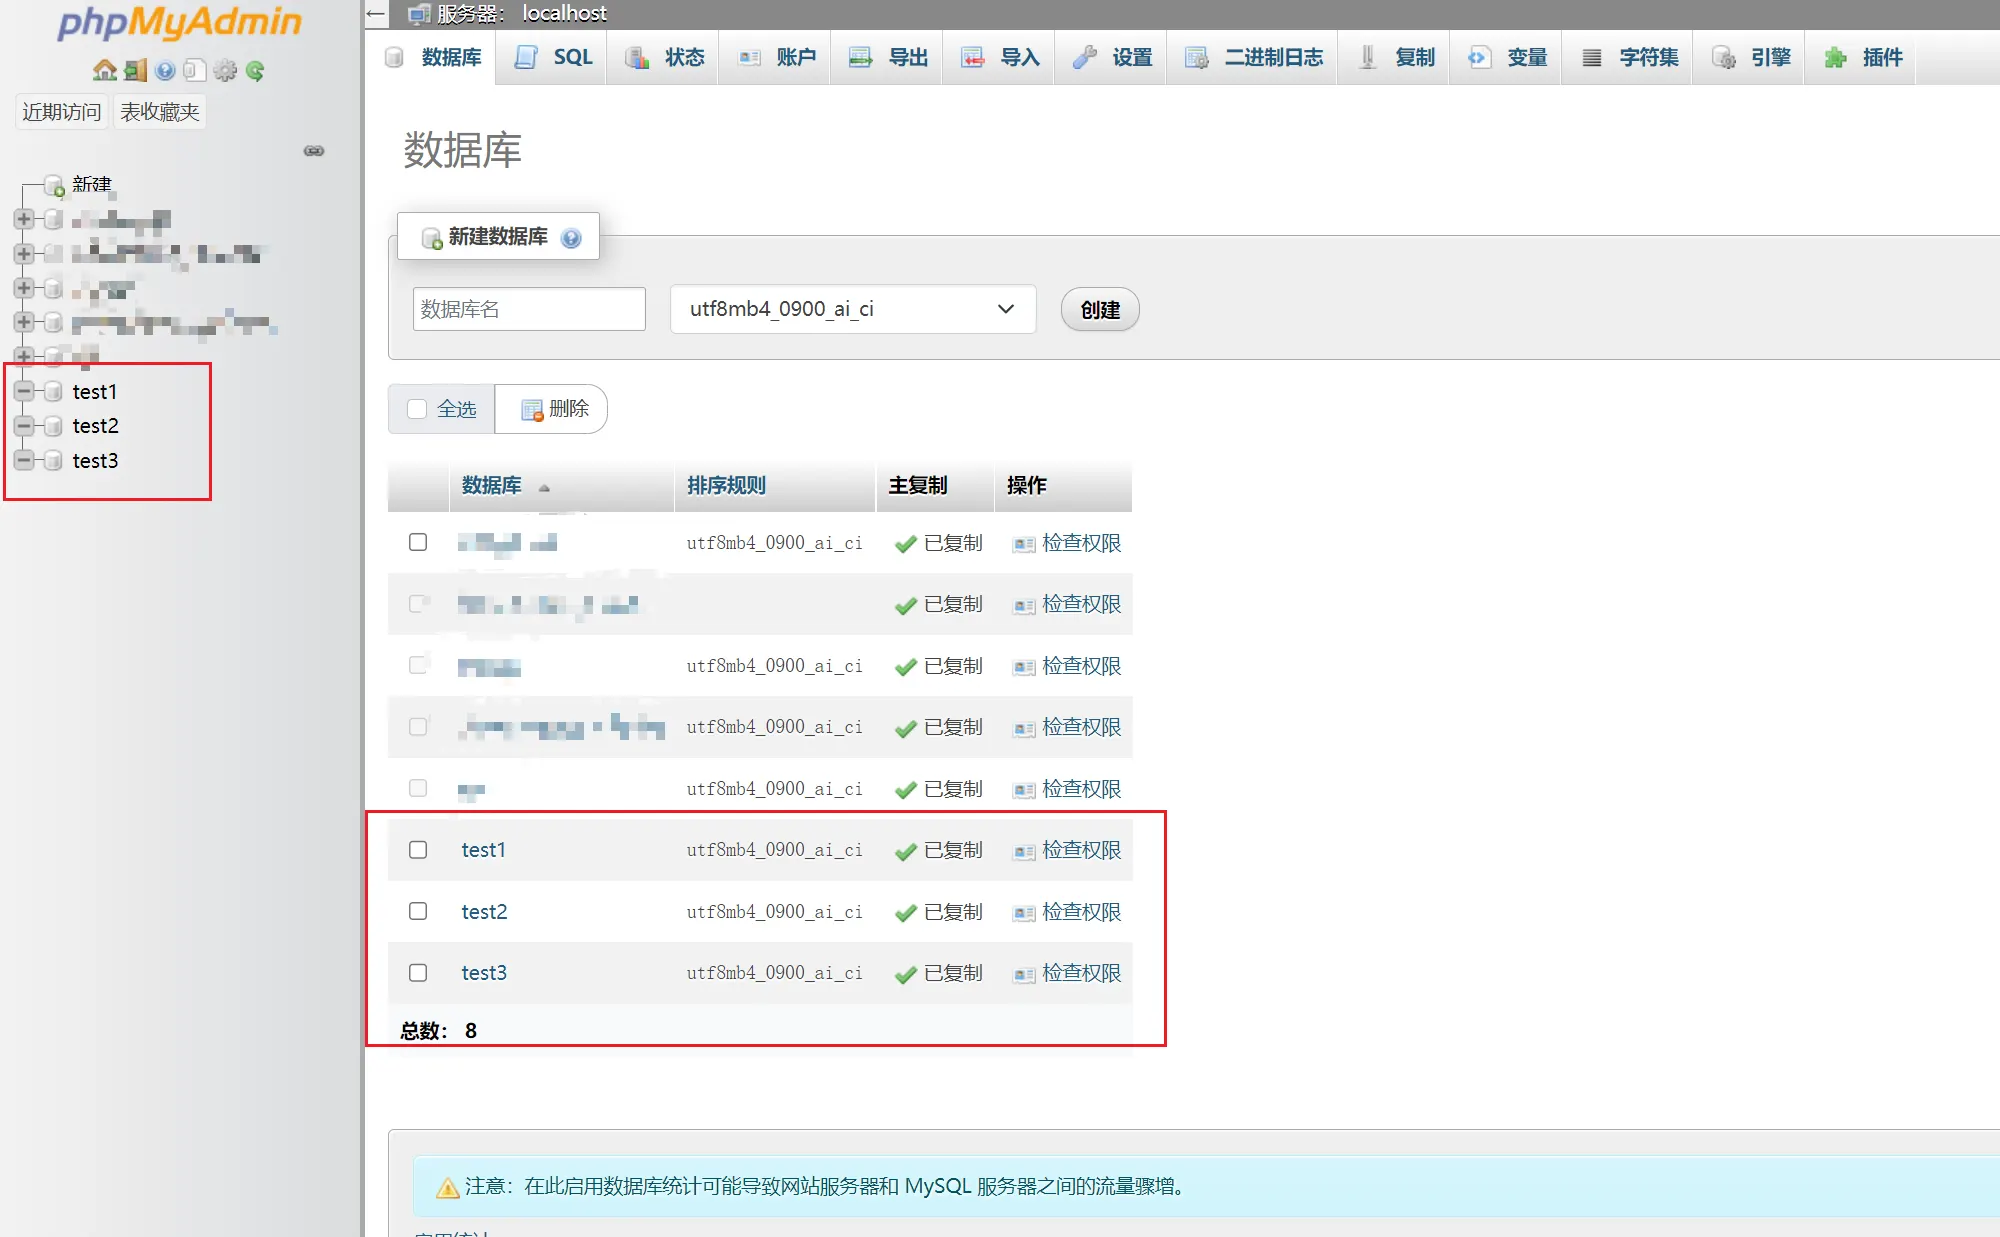
1、数据库创建
以root用户身份phpMyAdmin,点击上方数据库选项进行数据库创建,一共需要创建三个,例如创建test1、test2、test3三个数据库
2、数据库用户创建
点击上方用户选项卡,在页面中部可见新增用户账户选项,点击以创建用户

依次填入相关用户名、密码,主机名填localhost便可。权限的赋予选项中,可不赋予其全局权限,而待稍后分数据库赋予其权限即可。
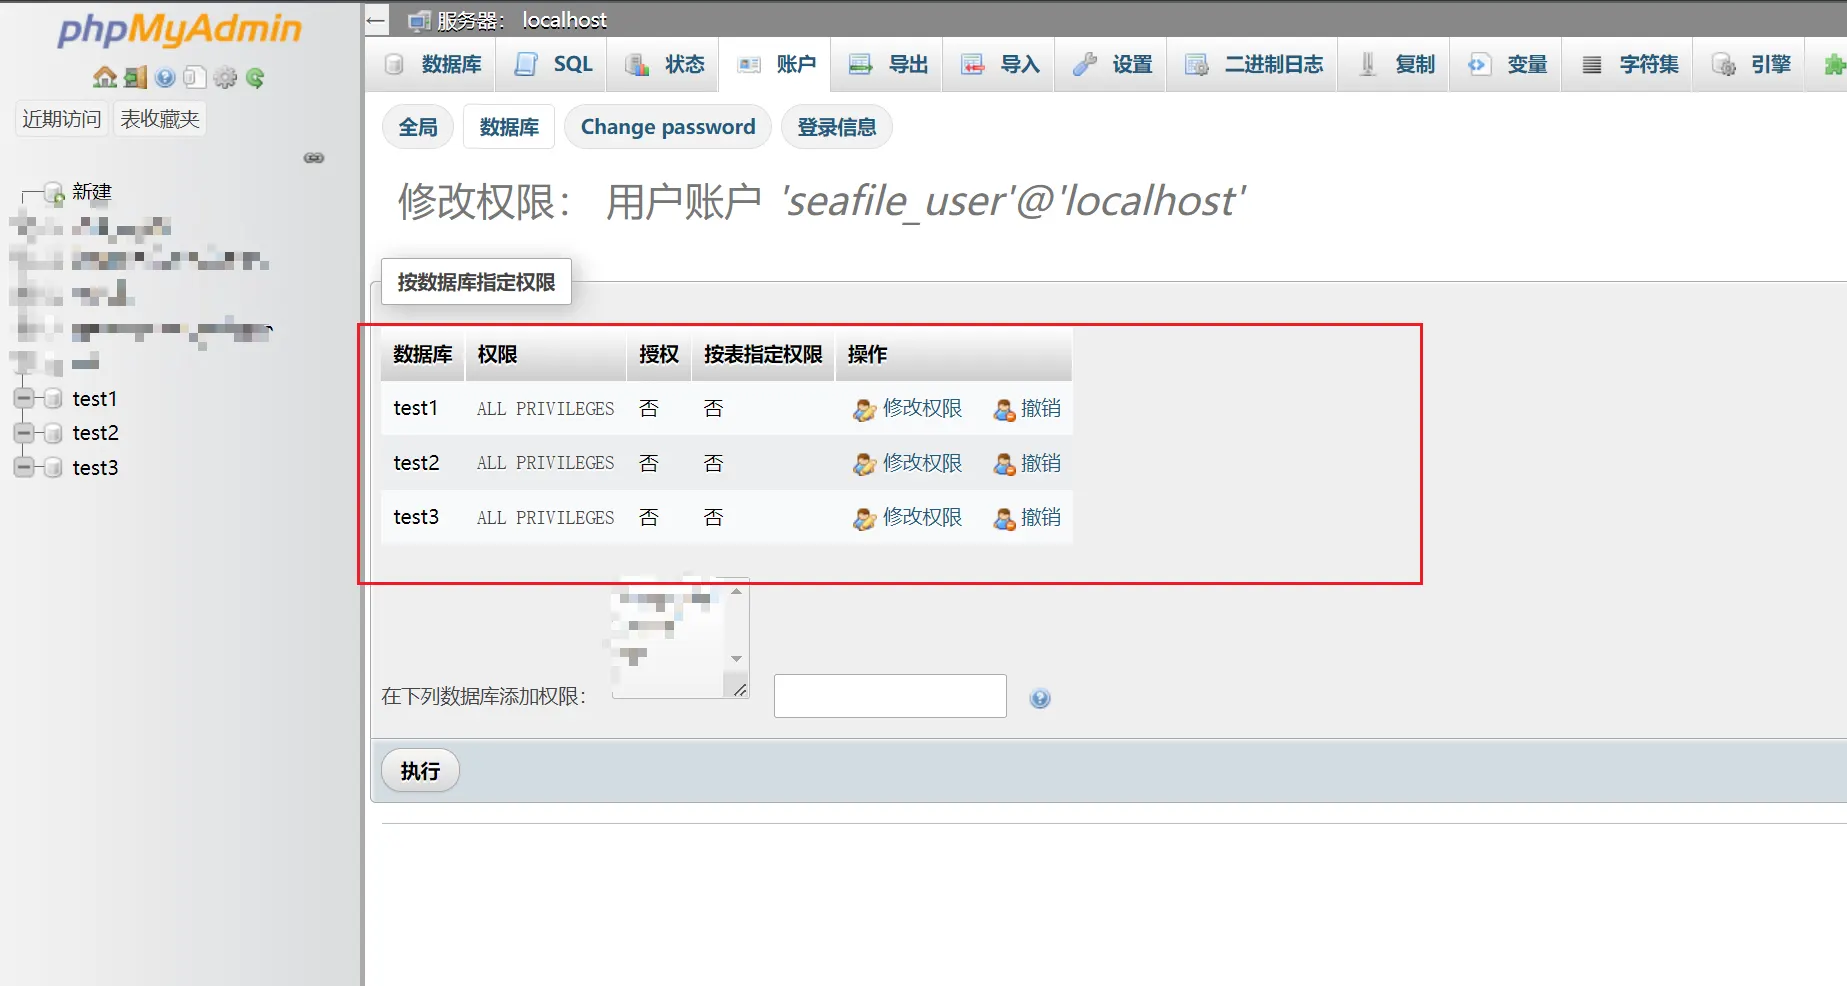
3、赋予用户数据库访问权限
在账户选项下,点击方才创建好的用户,继续点击数据库选项,在下方可见全部数据库,依次点击相关数据库赋予其权限即可
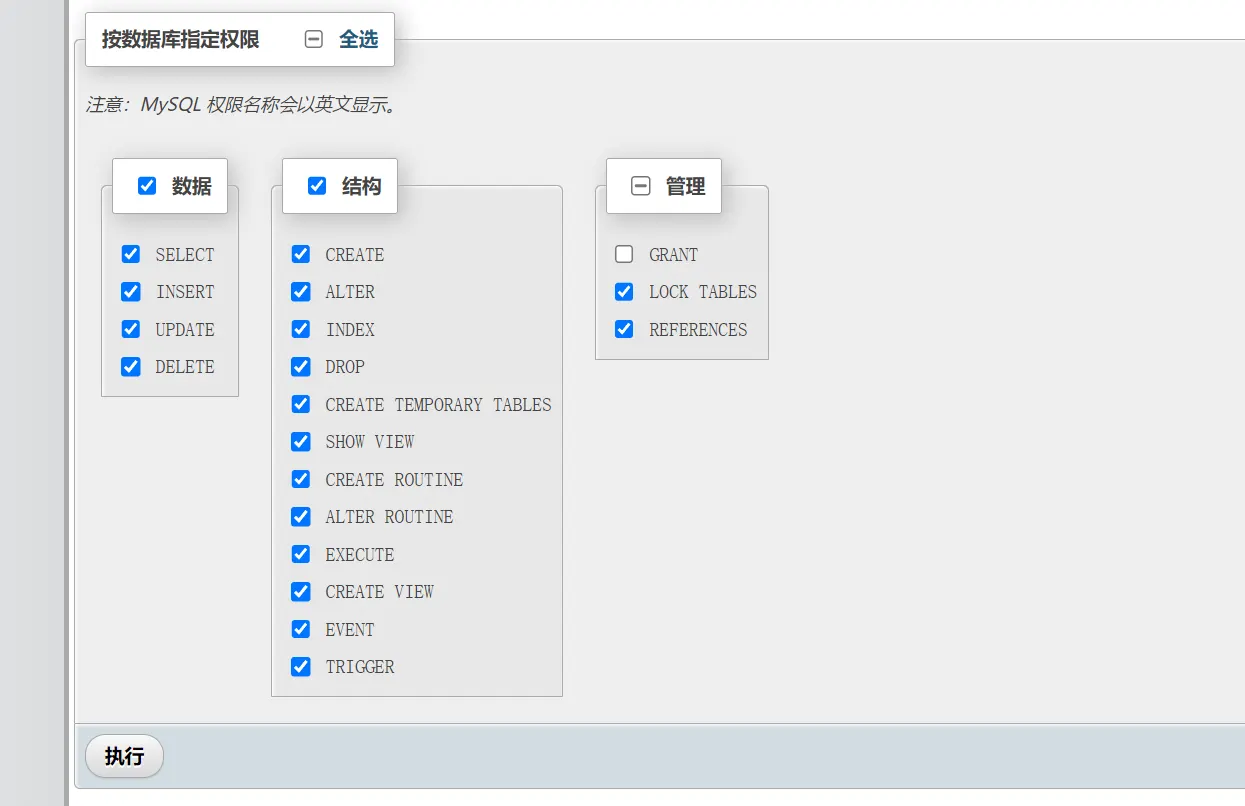
按数据库指定权限可参照下图设置
开始安装
进入安装目录,并运行安装脚本,脚本将会引导你进行网站的构建工作,只是简单的几个问题 。
cd seafile-server-*
./setup-seafile-mysql.sh安装的过程中会遇到写入数据库方式的选择,如果你选择与本文相同的步骤,那么就要选择第二项——使用现存的数据库([2] Use existing ccnet/seafile/seahub databases),以下是主要过程
-----------------------------------------------------------------
This script will guide you to setup your seafile server using MySQL.
Make sure you have read seafile server manual at

        https://download.seafile.com/published/seafile-manual/home.md

Press ENTER to continue
-----------------------------------------------------------------

What is the name of the server? It will be displayed on the client.
3 - 15 letters or digits
[ server name ] Seafile #填写服务名称

What is the ip or domain of the server?
For example: www.mycompany.com, 192.168.1.101
[ This server's ip or domain ] 127.0.0.1 #填写120.0.0.1即可,站点访问依赖反代

Which port do you want to use for the seafile fileserver?
[ default "8082" ] 31111 #网站服务端口号,可默认

-------------------------------------------------------
Please choose a way to initialize seafile databases:
-------------------------------------------------------

#选择创建数据库的方式,由于之前已经创建好了相关数据库,因此选择第二项

[1] Create new ccnet/seafile/seahub databases
[2] Use existing ccnet/seafile/seahub databases

[ 1 or 2 ] 2

What is the host of mysql server?
[ default "localhost" ] #默认即可

What is the port of mysql server?
[ default "3306" ] #默认即可

Which mysql user to use for seafile?
[ mysql user for seafile ] seafiledb-user #填写数据库用户名

What is the password for mysql user "seafilesu"?
[ password for seafilesu ]  #数据库用户密码

verifying password of user seafilesu ...  done

Enter the existing database name for ccnet:
[ ccnet database ] ccnet_db #填写ccnet的数据库名

verifying user "seafilesu" access to database ccnet_db ...  done

Enter the existing database name for seafile:
[ seafile database ] seafile_db #填写seafile数据库名

verifying user "seafilesu" access to database seafile_db ...  done

Enter the existing database name for seahub:
[ seahub database ] seahub_db #填写seahub数据库名

verifying user "seafilesu" access to database seahub_db ...  done

---------------------------------
This is your configuration
---------------------------------

    server name:            Seafile
    server ip/domain:       127.0.0.1

    seafile data dir:       /opt/seafile/installed/seafile-data
    fileserver port:        31111

    database:               use existing
    ccnet database:         ccnet_db
    seafile database:       seafile_db
    seahub database:        seahub_db
    database user:          seafiledb-user


---------------------------------
Press ENTER to continue, or Ctrl-C to abort
---------------------------------
确认无误后即回车开始安装,稍待片刻安装完成,若无报错那么就安装完成了。
启动与停止
在 ./seafile-server-latest 目录下运行启动命令
- 启动 Seafile:
./seafile.sh start- 启动 Seahub
./seahub.sh startseahub的启动可能会遇到问题,我将我在部署过程中所遇到的一些错误记录于此:Seafile部署过程中遇到的一些问题及解决
如果想要在另一端口上运行Seahub则需要修改安装目录下 ./conf/gunicorn.conf.py 文件中的相关字段,注意需要将127.0.0.1修改为0.0.0.0,例如:
#bind = "127.0.0.1:8000"

#将上一行注释,并修改为=>
bind = "0.0.0.0:31111"
修改完成后要停止seafile与seahub服务的运行并重新启动
- 停止运行
./seafile.sh stop
./seahub.sh stop- 重新启动
./seafile.sh restart
./seahub.sh restartseahub如启动失败还可通过如下操作查看失败原因
./seahub.sh start-fastcgi关于开机自启的配置可参照官方文档Seafile-开机自启动
至此,服务端已基本部署完毕,接下来需要进行Nginx 的反向代理,配置文件可参照官方文档或Seafile Nginx 反代配置文件